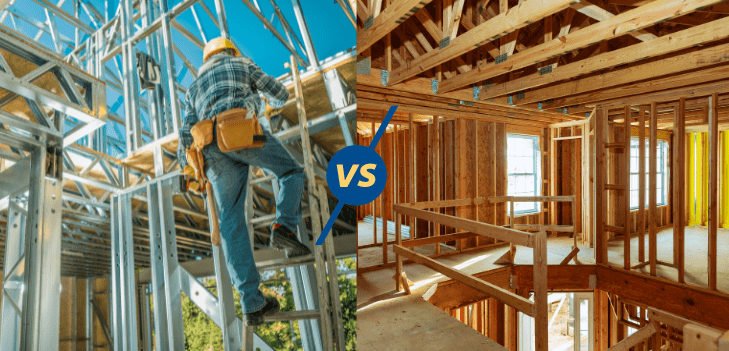
1. Introduction
What are SIP panels?
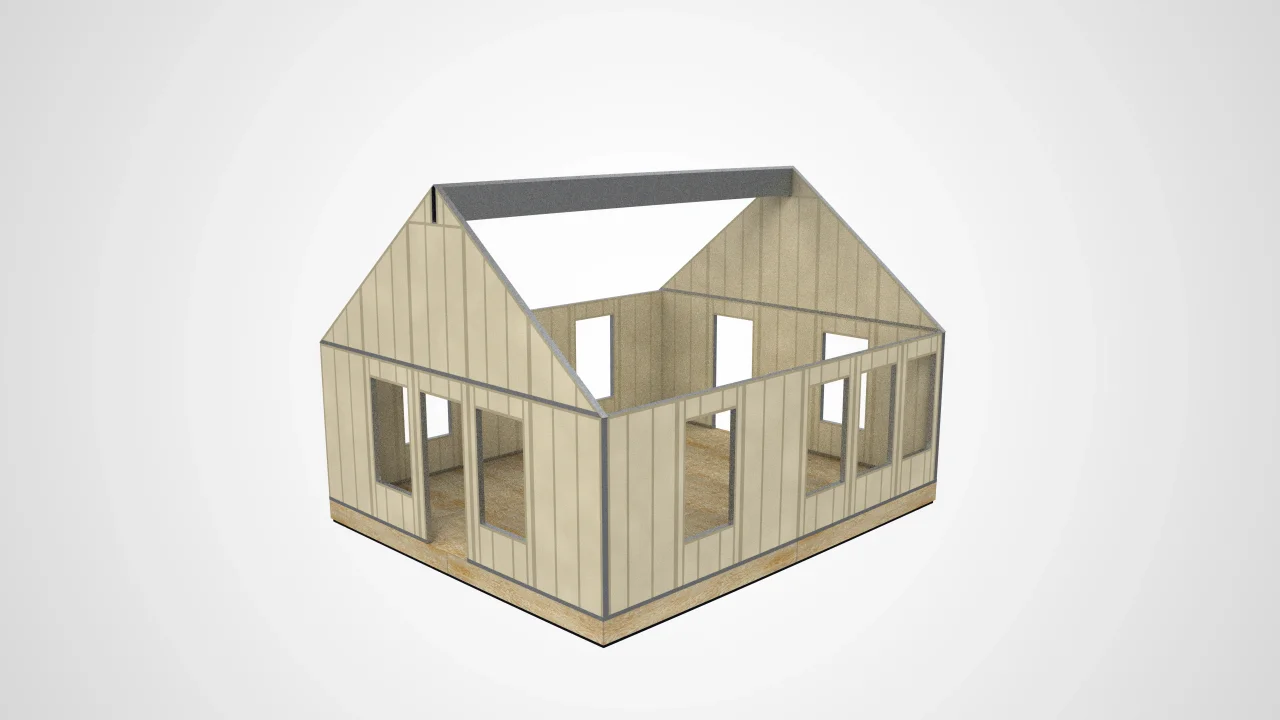
Structural Insulated Panels (SIP) are prefabricated construction elements, typically consisting of a layer of thermal insulation (EPS, PUR, or another type of rigid insulation) sandwiched between two facing boards (OSB, MgO, fiber cement, etc.). These panels provide both structural strength and excellent thermal and acoustic insulation.
Why choose SIP technology for construction?
- High energy efficiency: Thanks to the integrated insulation, SIP panels significantly reduce heat loss, helping to meet NZEB (Nearly Zero Energy Building) requirements.
- Short construction time: Being a prefabricated system, SIPs are installed quickly, reducing labor costs and the overall duration of the project.
- Reduced weight: Compared to traditional elements (brick or concrete), SIPs are considerably lighter, which can also reduce foundation requirements.
- Design flexibility: SIP panels can be adapted to multiple types of construction — from residential homes to commercial or institutional buildings.
Benefits of using SIP panels in design
- Easy integration with green building standards: Can help achieve LEED, BREEAM, or other sustainability certification schemes.
- Long-term cost reduction: Savings on heating/cooling, plus minimal maintenance for structural elements.
- Versatility: Can be used for walls, floors, or roofs, offering a unified approach to the thermal envelope concept.
2. Technical Characteristics of SIP Panels
Composition of SIP panels
- OSB, MgO, or fiber cement facings: Provide strength and rigidity.
- The insulation layer (EPS, PUR, XPS, etc.): Delivers superior thermal and acoustic performance.
- Specific adhesives: High-performance adhesives are used to bond the facings and the core, forming a monolithic system.
Available standard thicknesses and specifications
- Total thickness: Usually between 100 mm and 320 mm or even more, depending on insulation and strength requirements.
- Common dimensions: Panels with a width of 1200 mm and variable lengths (from 2400 mm up to 3000 mm or more).
Note: Suppliers can customize dimensions according to project needs, but standardization reduces costs and construction time.
Thermal and acoustic insulation properties
- Thermal transfer coefficient (U-value): The lower the value, the better the insulation (e.g., 0.20 W/m²K or even lower, depending on thickness).
- Acoustic insulation: Panels with OSB facings and an EPS core can achieve high STC (Sound Transmission Class) values, depending on thickness and insulation type.
Structural strength and quality testing
- Compressive and bending strength: Laboratory tests confirm that SIP panels can carry vertical and horizontal loads (load-bearing walls, roofs, floors).
- Quality standards: SIP panels are generally tested to international standards (e.g., ASTM E1803, EN 14509, etc.) and hold technical approvals specific to each country.
3. Integrating SIP Panels into Projects
How to design exterior walls with SIP
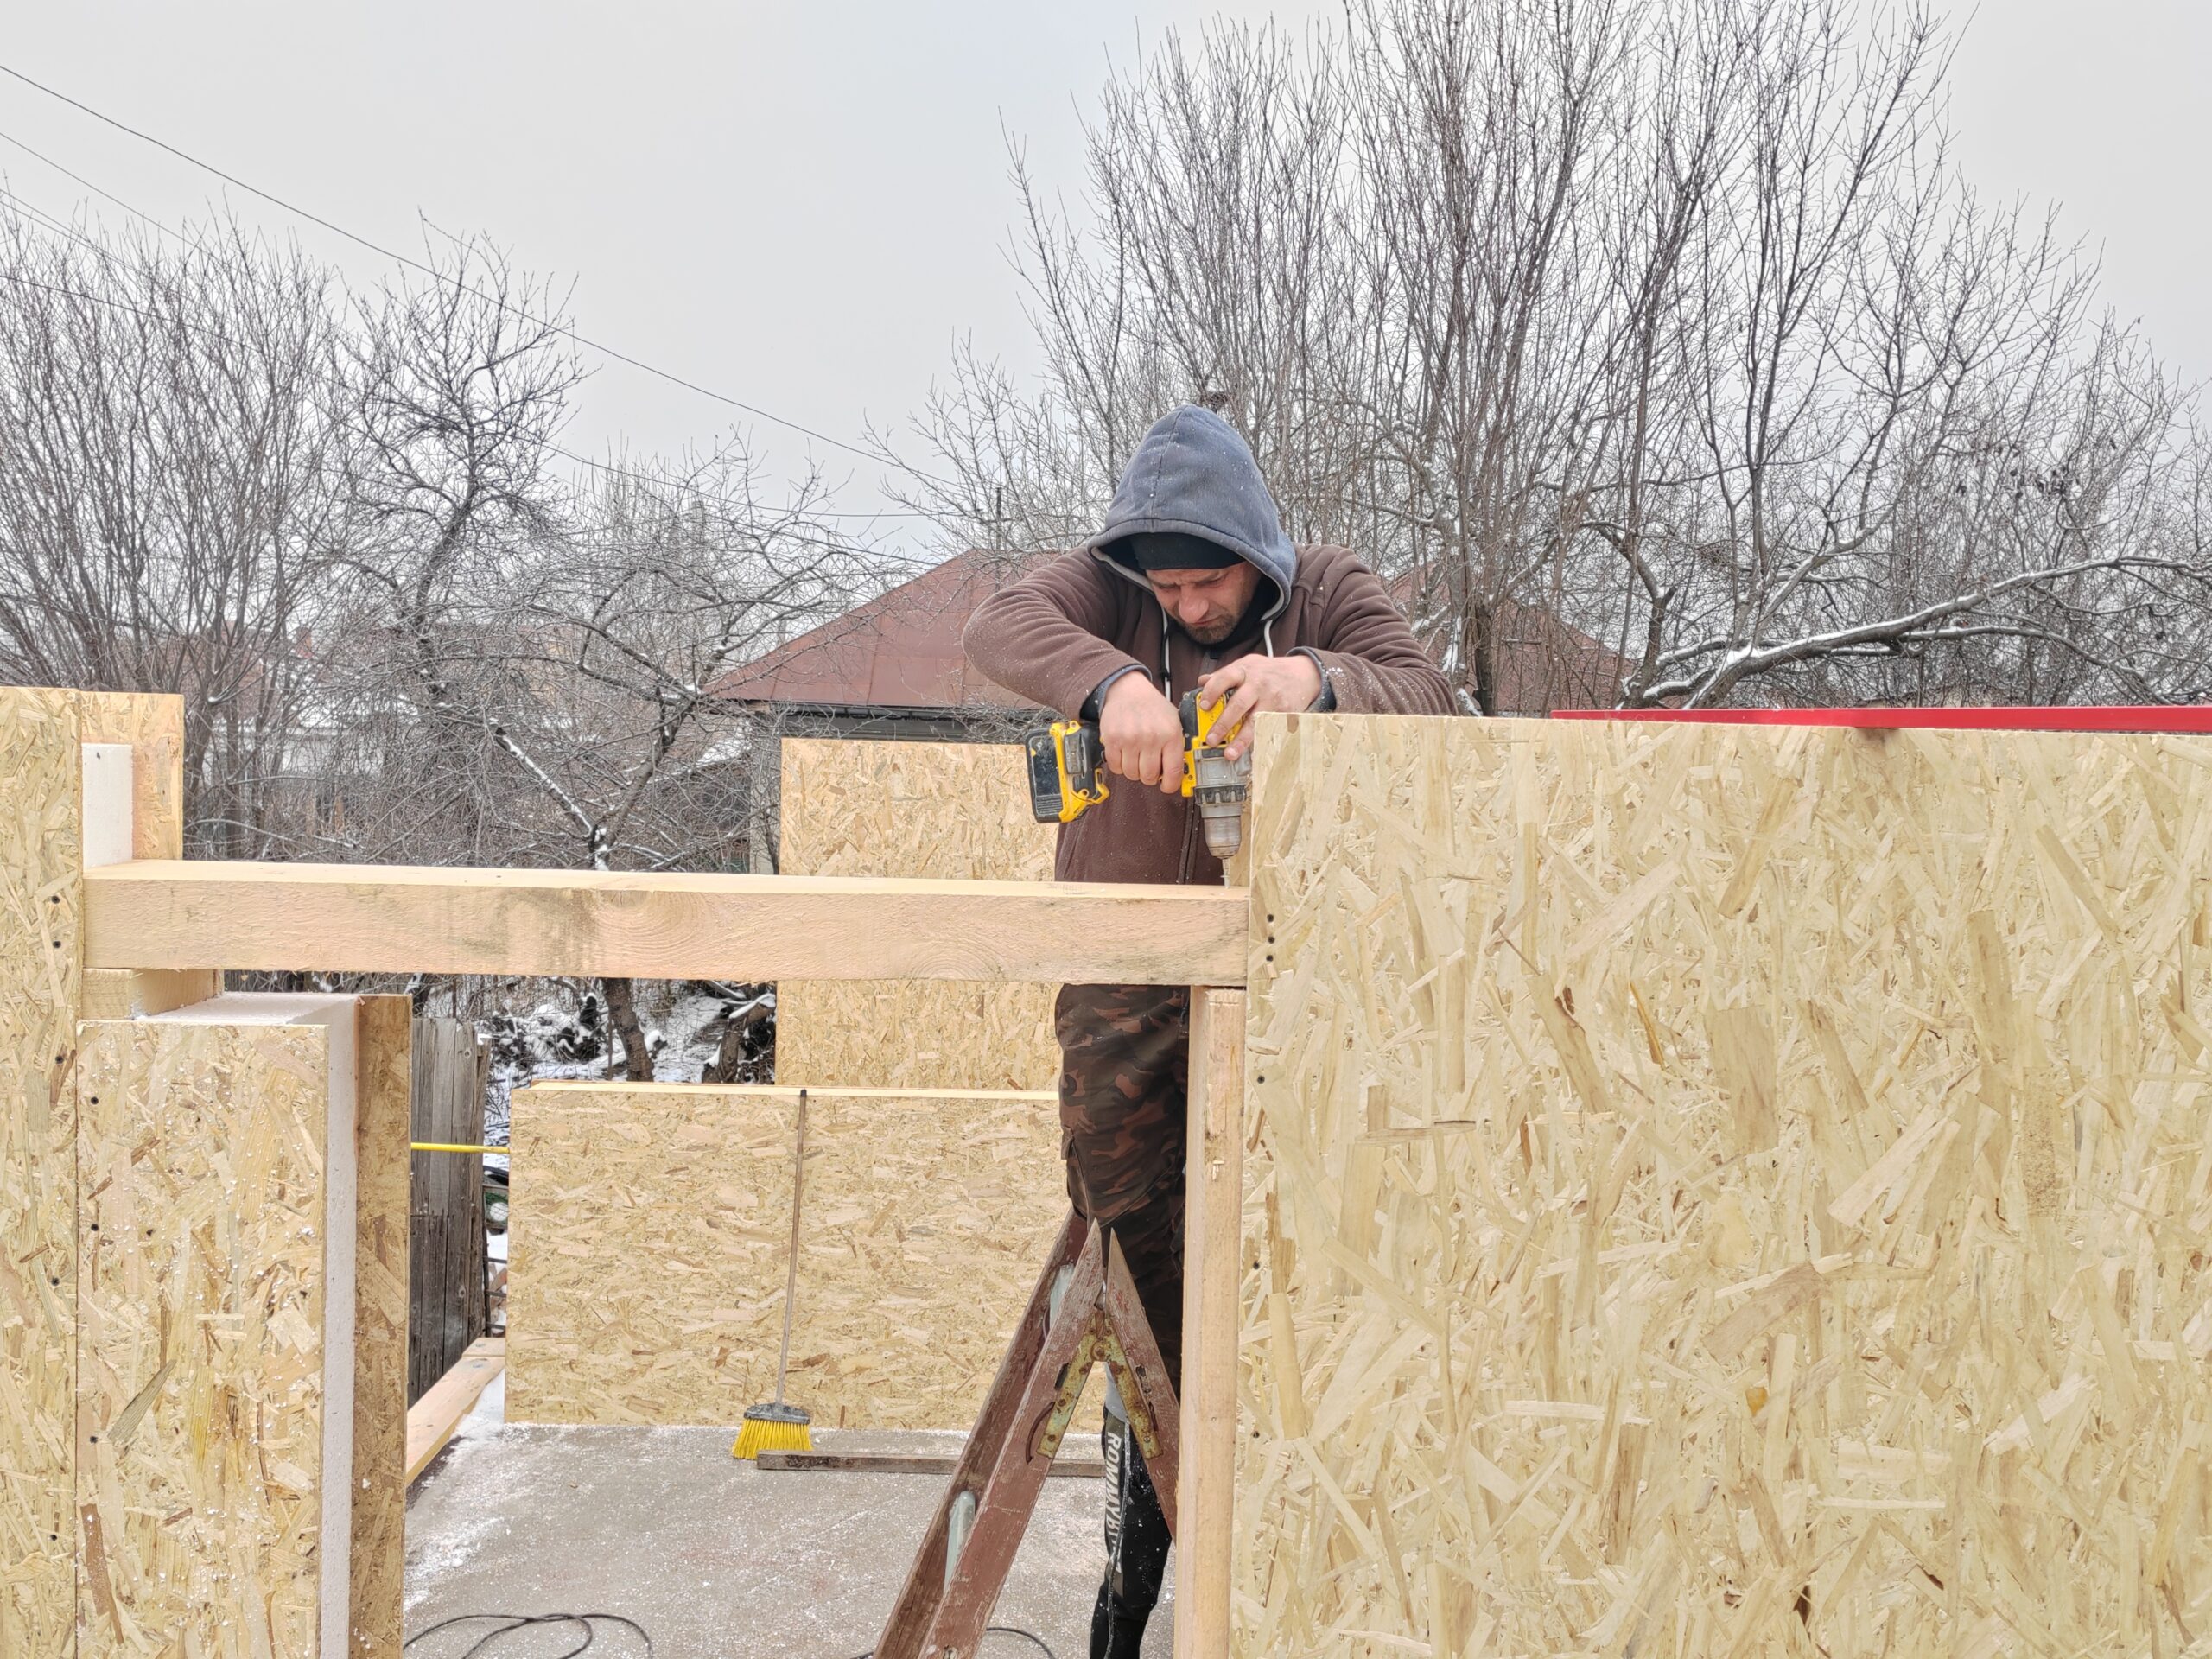
- Installation layout: The panels are set on a wood or metal track (bottom plate), fixed vertically, and a beam (top plate) is used at the top to close off the panels.
- Vapor barrier and weather protection: Depending on the climate, additional protective membranes may be needed (waterproofing membranes, vapor or air barriers).
- Exterior finishes: Can be applied directly to the OSB (insulating render, siding, decorative stone, etc.), using appropriate fastening systems.
Floors and roofs built from SIP
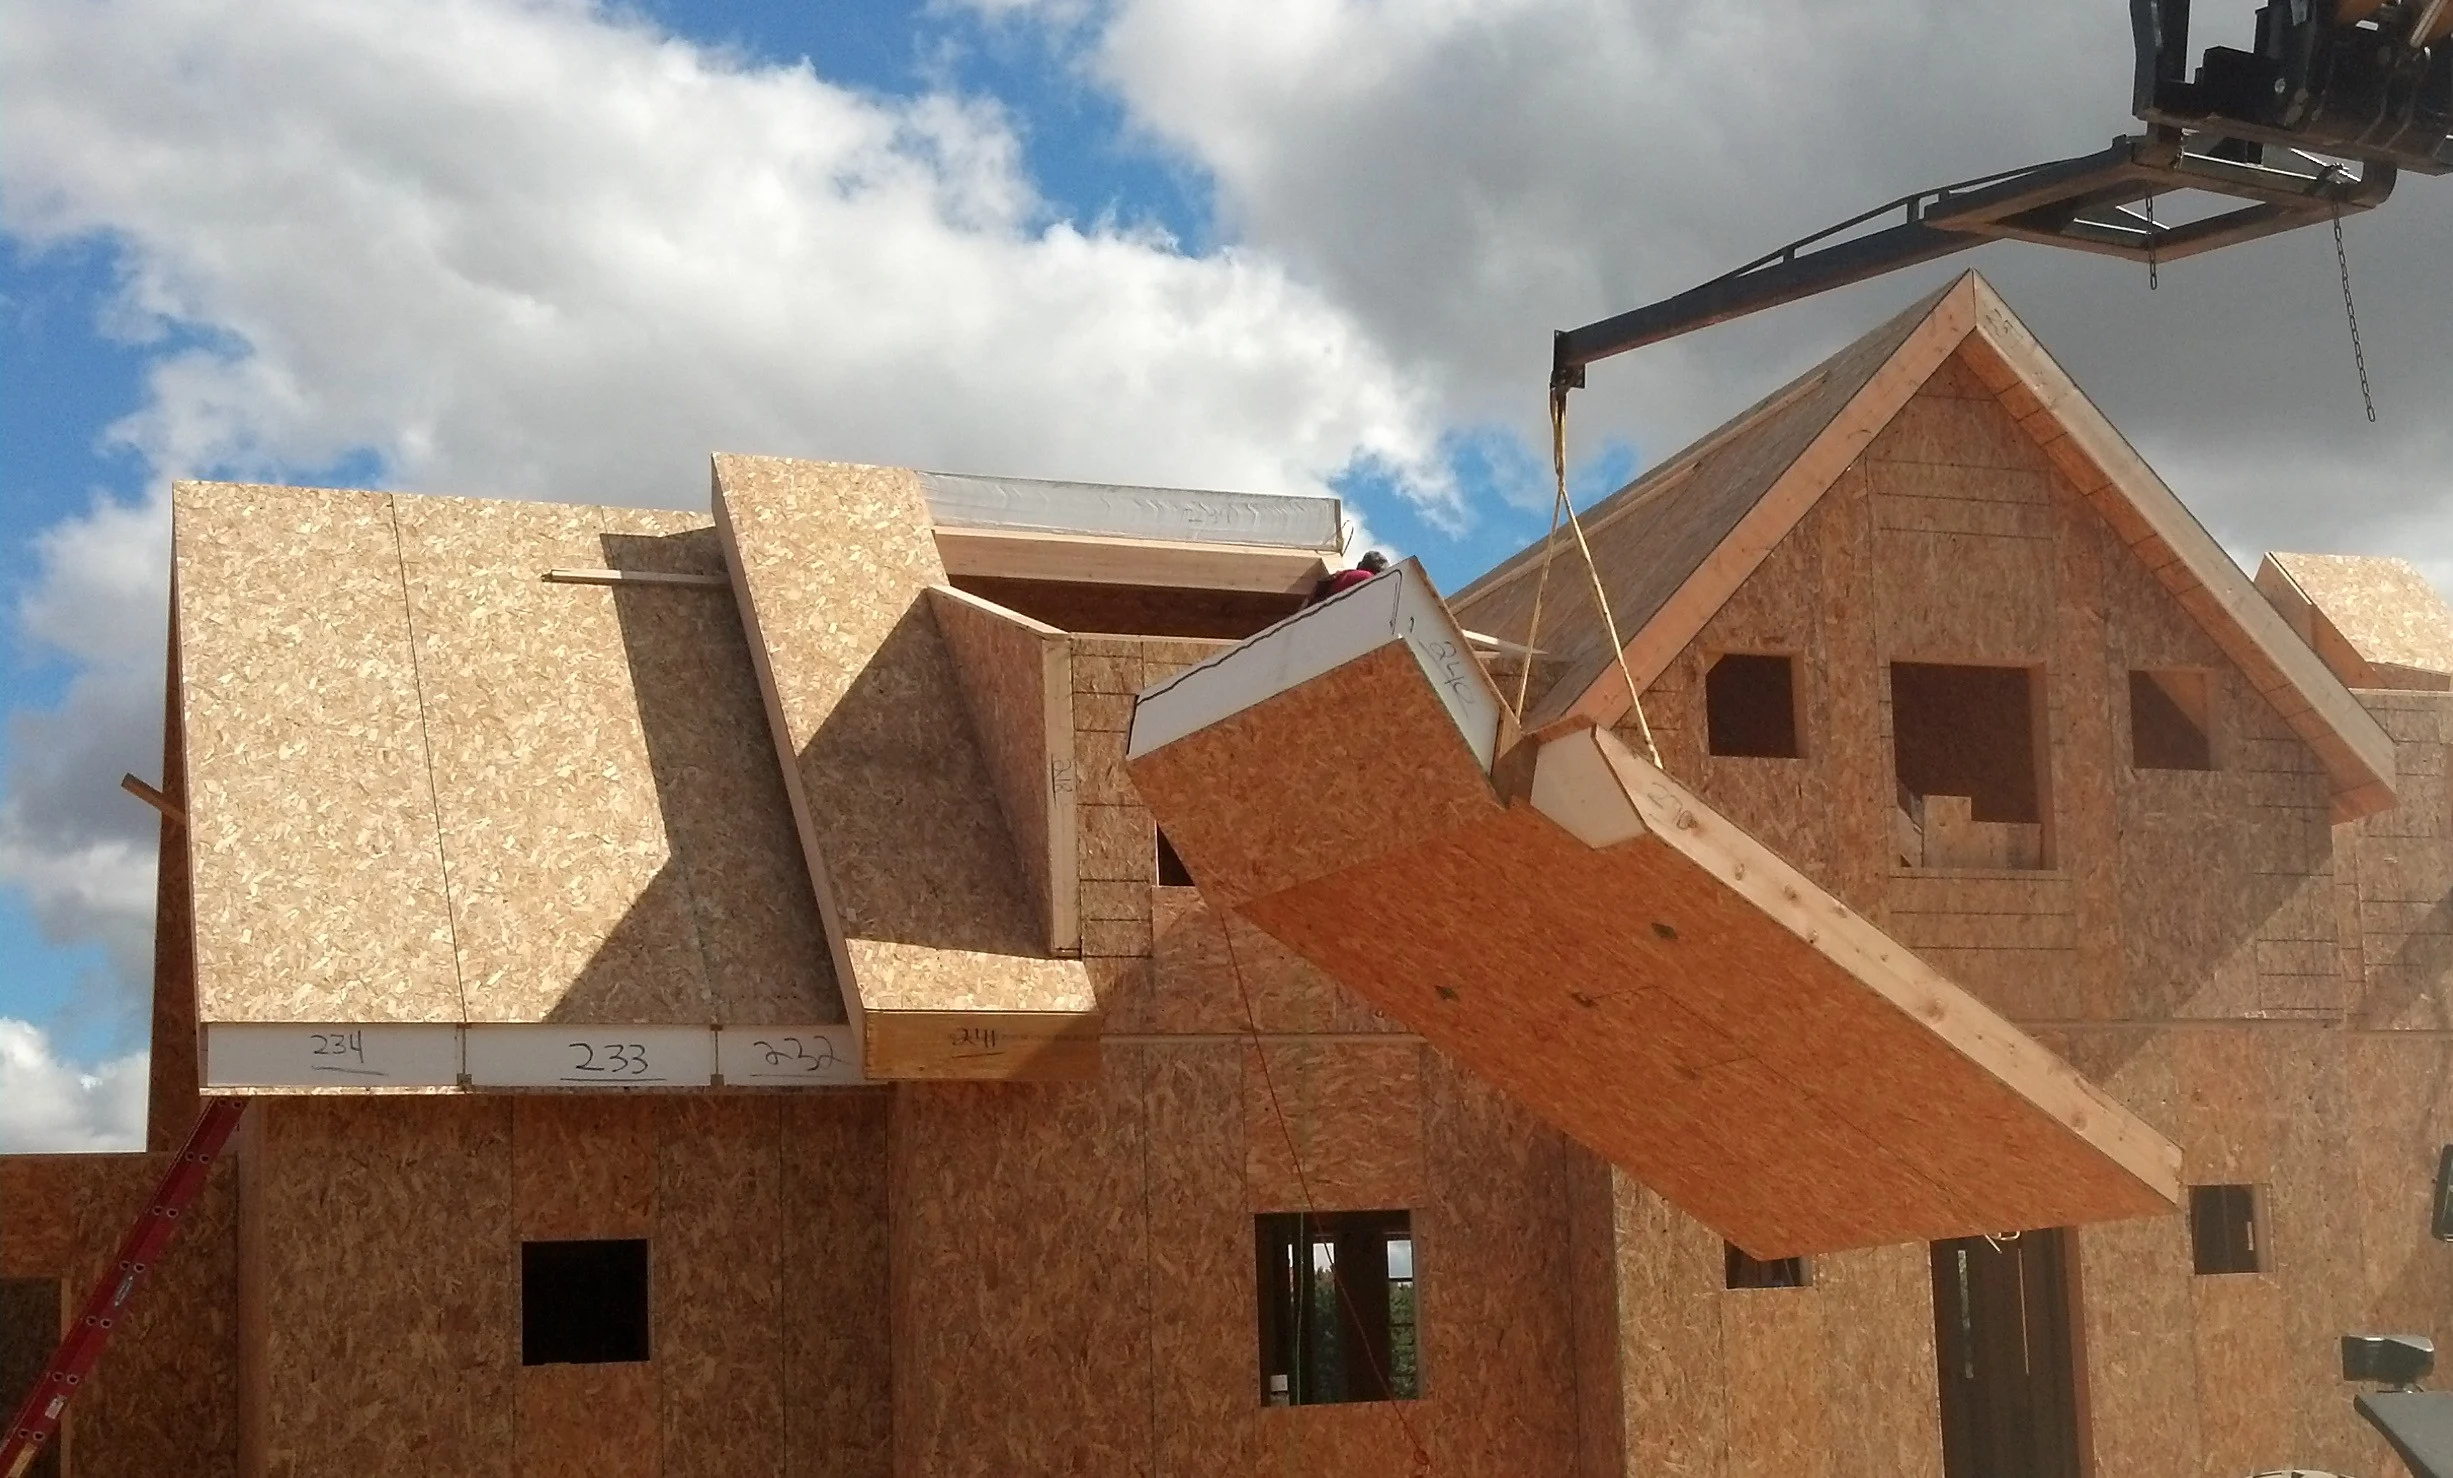
- Floors: SIP panels can be used as a load-bearing element for floors, installed on beams or metal structures.
- Roofs: Used either on a sloped plane (for A-frame structures or classic roofs) or for flat roofs (with minimal slopes for water drainage).
Connecting SIP panels: details on joints, sealing, and thermal bridge prevention

- Tongue-and-groove joints, supplemented with polyurethane foam and sealing tape to prevent air or water infiltration.
- Minimal thermal bridging: Thanks to the continuity of the insulation within the panel, thermal bridges are greatly reduced compared to traditional stud-and-rail systems.
SIP compatibility with other materials
- Concrete: The ground-floor concrete slab can be poured first, with the SIP panels installed on it afterward. Anchor tracks must be planned from the formwork stage.
- Timber structure: SIP panels are often supplemented with timber frames for specific areas (door/window openings).
- Steel structure: Requires special fastening systems (self-tapping screws, metal brackets).
4. Advantages for Architects and Designers
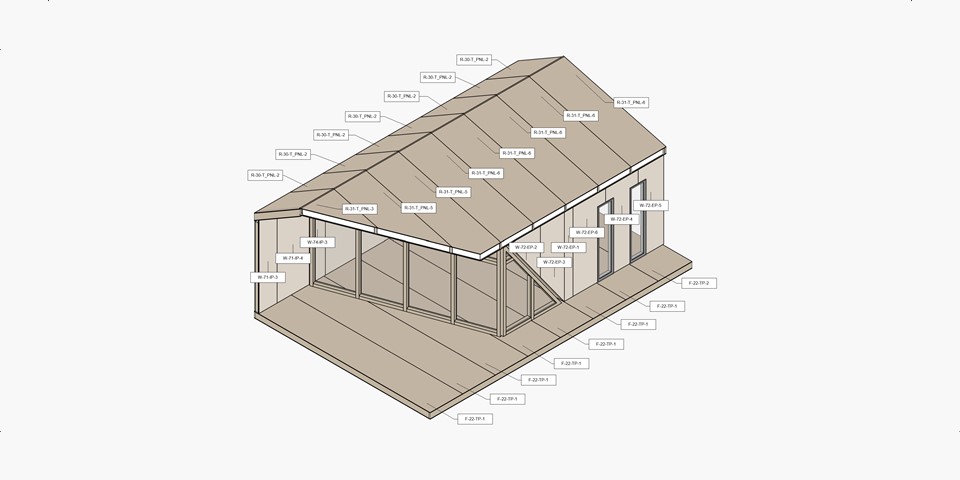
Reducing design and construction time
- Optimized design: Technical data provided by manufacturers makes it easier to size panels correctly.
- Fast assembly: Panels arrive prefabricated at near-final dimensions, which reduces on-site adjustments.
Architectural design flexibility
- Variety of finishes: A range of exterior materials can be applied (exposed brick, siding, render, etc.).
- Complex shapes: SIP panels can be factory-cut to accommodate unusual geometries (triangular windows, rounded corners, etc.).
Meeting energy efficiency standards
- NZEB (Nearly Zero Energy Building): SIP panels help achieve superior thermal insulation values, contributing to reduced energy consumption.
- Green certifications: LEED, BREEAM, or other standards can be met more easily thanks to the high insulation content and increased airtightness.
The potential for green certifications
- Extra points in rating schemes: Using materials with recycled content or reduced environmental impact can raise the building's score.
- Enhanced sustainability profile: "Green" buildings are increasingly in demand, giving architects a competitive edge.
5. Case Studies and Project Examples
Examples of residential homes built with SIP
- Single-family homes: Excellent thermal insulation and short construction time.
- Duplexes or row houses: A modular system that allows construction details to be repeated, reducing unit costs.
Commercial projects with SIP: offices, tourist facilities, schools
- Office buildings: Gain energy benefits and can meet green certification criteria.
- Tourist facilities: Fast installation in hard-to-reach areas, efficient heating and cooling.
- Classrooms and kindergartens: Enhanced thermal and acoustic comfort, plus "clean" construction with minimal dust.
Designing A-frame houses using SIP
- SIP roof/walls in a single plane: Fast structural build, very good airtightness against air infiltration.
- Modern and durable design: Popular in mountain areas, cabins, or vacation homes.
Cost analysis and long-term savings
- Initial cost: May be higher than conventional construction (brick/concrete), but it pays off through energy savings and reduced construction time.
- Total cost of ownership (TCO): Drops considerably thanks to lower maintenance and reduced utility bills.
6. Stages in the SIP Design Process
Collaborating with the SIP panel supplier
- Initial discussions: Establishing insulation, strength, budget, and timeline requirements.
- Detailed design: Technical guidance on panel thickness, insulation type, and installation details.
Choosing panel thickness and type
- Climate and local regulations: Colder regions require thicker panels, and local codes may set minimum insulation values (e.g., U-value below 0.20 W/m²K).
- Structure type: Load-bearing walls require panels with higher strength, while interior partitions can use thinner panels.
Calculating thermal insulation to comply with local regulations
- Specialized software: Using thermal modeling programs (e.g., THERM, ArchiCAD, Revit with a specialized plugin) to check thermal bridges.
- Verification against national codes: Complying with thermal transmittance, airtightness, and ventilation requirements (e.g., the C107/2013 code, or applicable local guidelines).
Specifying installation details
- Detail plans and sections: Panel joint locations, foundation fixings, roof connections, etc.
- Attention to critical areas: Corners, door/window openings, utilities passing through panels, air and vapor barriers.
7. Technical Considerations and Challenges
Managing thermal bridges and airtightness
- Adhesive tapes and polyurethane foam: Used to seal joints between panels and at corners.
- Continuous insulation layer: Correct panel placement and avoiding interruptions to the insulating layer caused by continuous metal or wood elements.
Compatibility with HVAC systems and electrical installations
- Ductwork and cable runs: Careful planning of pipe and cable routing to avoid uncontrolled perforations in the panels.
- Maintenance accessibility: Leaving dedicated areas for HVAC equipment (technical rooms, false ceiling spaces, or double walls).
Solutions for windows, doors, and other structural elements
- Wood or metal frames: Embedded in the cut-out area of the panel, providing the necessary rigidity and a tight seal for window and door installation.
- Vapor barrier and sealing: Special membranes and tapes applied around windows/doors to prevent infiltration.
Preventing condensation and managing moisture
- Thermal-hygrometric calculation: Identifying the dew point and correctly designing the vapor barrier.
- Controlled mechanical ventilation (VMC): If airtightness is very high, a heat-recovery ventilation system is recommended.
8. Design Tools and Resources
Recommended software
- AutoCAD, Revit, ArchiCAD: For technical drawing and 3D modeling.
- SIP plugins/modules: Specific extensions exist that contain libraries of construction details for SIP panels, easing the design work.
Library of technical details (DWG/DXF drawings)
- Standard collections: Typical details for various joints (interior corner, exterior corner, foundation connection).
- Customization: Adapting details to the specifics of the project (panel thickness, exterior facing type, insulation type).
Examples of standardized specifications
- Product data sheets: Include information on fire resistance, thermal transfer coefficient, and weight.
- Technical specifications: Examples of minimum performance requirements (U-value, STC, mechanical strength, etc.).
9. Working with BucovinaSIP
Services offered to architects and designers
- Technical consultancy: Support in choosing the optimal panel type and thickness, and adapting to local conditions.
- Design support: DWG/DXF details, 3D models, and assistance interpreting technical regulations.
- Professional training and seminars: Training sessions to better understand the SIP system and how to integrate it into projects.
Access to technical support and consultancy
- In-house design team: Specialists who can review plans and propose construction solutions.
- On-site assistance: The option to send an expert to the installation to ensure technical details are followed correctly.
How to order SIP panels and integrate the details into projects
- Order process: From the initial request (dimensions, quantities, insulation type) to final delivery.
- Lead times: Panels can be produced within a few weeks, depending on order complexity and volume.
- Project integration: Adapting existing plans in consultation with the BucovinaSIP team for correct installation.
10. Conclusions and Recommendations
Competitive advantages of SIP panels
- High energy performance, reduced construction time, and design versatility are the main arguments for adopting this technology.
- Sustainability and efficiency: SIP panels help reduce carbon footprint and energy costs.
How to educate clients about the benefits of SIP technology
- Presentations and samples: Explaining the structure of a SIP panel and its advantages.
- Comparison with traditional systems: Showing cost and time savings, as well as superior thermal comfort.
- Promotional materials: Brochures, video clips, case studies of completed buildings.
Next steps for integrating SIP into architectural projects
- Continuous research and training: Stay up to date with the latest developments in SIP technology, approvals, and regulations.
- Collaboration with trusted suppliers: BucovinaSIP offers specialized support, technical details, and consultancy throughout the project.
- Planning and adaptation: Integrate SIP early into the architectural concept and structural calculations to maximize the benefits.
Additional Details and Resources
2. Comparative Tables
To highlight the advantages of SIP panels over other construction materials, it is useful to include comparative tables. These can be used both in discussions with clients and in the project's official documentation.
Thermal performance of SIP panels vs. other materials
| Material | Typical Thickness (mm) | Thermal Transfer Coefficient (U-value) | Notes |
|---|
| SIP Panels | 150 | 0.12 – 0.22 W/m²K | Includes integrated insulation; minimal thermal bridging |
| Brick | 300 | 0.35 – 0.45 W/m²K (without additional insulation) | Requires supplementary thermal insulation |
| Concrete | 200 | 0.50 – 0.60 W/m²K (without additional insulation) | High thermal transfer, heavy weight |
Initial costs and long-term savings
| Construction System | Initial Cost / m² | Average Construction Time | Heating/Cooling Savings | Payback Period (years) |
|---|
| SIP Panels | Medium | Low | High (20-30%) | 5 – 10 |
| Masonry | Medium | Medium | Medium (10-15%) | 10 – 15 |
| Steel Structure + Traditional Insulation | High | Long | Medium (15-20%) | 10 – 15 |
Below is an indicative example of a comparative table with approximate thermal transfer coefficient (U-value) figures for SIP panels with thicknesses of 120 mm, 170 mm, 220 mm, and 320 mm, made from various combinations of insulation (white EPS, graphite EPS, PUR) and facings (MgO, OSB, fiber cement).
| Thickness / Configuration | White EPS + MGO | White EPS + OSB | White EPS + Fiber Cement | Graphite EPS + MGO | Graphite EPS + OSB | Graphite EPS + Fiber Cement | PUR + MGO | PUR + OSB | PUR + Fiber Cement |
|---|
| 120 mm | 0.24 W/m²K | 0.26 W/m²K | 0.25 W/m²K | 0.20 W/m²K | 0.22 W/m²K | 0.21 W/m²K | 0.18 W/m²K | 0.19 W/m²K | 0.18 W/m²K |
| 170 mm | 0.20 W/m²K | 0.21 W/m²K | 0.20 W/m²K | 0.17 W/m²K | 0.18 W/m²K | 0.17 W/m²K | 0.15 W/m²K | 0.16 W/m²K | 0.15 W/m²K |
| 220 mm | 0.18 W/m²K | 0.19 W/m²K | 0.18 W/m²K | 0.15 W/m²K | 0.16 W/m²K | 0.15 W/m²K | 0.13 W/m²K | 0.14 W/m²K | 0.13 W/m²K |
| 320 mm | 0.14 W/m²K | 0.15 W/m²K | 0.14 W/m²K | 0.12 W/m²K | 0.13 W/m²K | 0.12 W/m²K | 0.10 W/m²K | 0.11 W/m²K | 0.10 W/m²K |
Note: The values are approximate and may vary depending on the manufacturer, the exact density of the material, adhesive quality, and actual installation conditions. For precise data, always consult the technical data sheets and approvals issued by the supplier.
Notes on interpreting U-values:
- The total panel thickness includes both the insulation layer and the thickness of the facings (e.g., MgO, OSB, fiber cement), as well as any adhesive gap. Depending on the exact configuration, the thickness of the insulating core may vary by a few millimeters.
- The conductivity of the facings differs slightly between MgO, OSB, and fiber cement, but most of the thermal advantage comes from the insulating core.
- Graphite EPS vs. white EPS: Graphite EPS has a lower thermal conductivity (about 0.030 W/mK compared to ~0.034-0.038 W/mK for white EPS), resulting in better (lower) U-values.
- PUR (rigid polyurethane) generally offers the best thermal performance at similar thicknesses, but also comes at a higher price compared to EPS.
- Differences between facing types (MgO, OSB, fiber cement) can be significant in terms of fire resistance, mechanical strength, and moisture resistance, but their thermal influence is relatively minor compared to that of the insulation itself.
Recommendation:
To determine the exact U-value (thermal transfer coefficient) required for your project, take into account:
- Local codes and requirements (maximum allowable U-values for exterior walls, roofs, etc.).
- The climate zone and energy efficiency strategy (to meet NZEB criteria).
- The actual SIP supplier, who can provide product data sheets and laboratory tests specific to each configuration.
Note: The values above are indicative and may vary depending on the geographic area, local material prices, and construction standards.
3. Checklists and Practical Sheets
To make designers' work easier and avoid omissions, practical sheets and checklists can be created for use at every stage of the project.
3.1. Steps for Integrating SIP into a New Project
- Initial research: Identifying local regulations, thermal insulation codes, and structural strength requirements.
- Consultation with the SIP supplier: Discussion of panel types, thicknesses, and production and delivery timelines.
- Pre-design: Establishing the architectural concept and preliminary plans (structural framing, partitioning, thermal bridges, etc.).
- Detailed design: Integrating SIP panels into the structural and architectural plans, defining fastening systems and details at the foundation, roof, and finishes.
- Technical verifications: Thermal insulation calculation (U-value), thermal bridge analysis, fire resistance, seismic calculations (where applicable).
- Site planning: Scheduling construction stages, organizing the installation crew, and planning equipment needs.
- Installation and supervision: Ongoing verification of how panels are assembled (sealing, alignment, fastenings).
- Handover and final testing: Airtightness tests (blower door test), compliance with the plans, and quality certificates.
3.2. Technical Checks Before Construction Begins
- Quality control plan: Make sure there is a clear list of parameters to check (panel thickness, insulation quality, compliance with standards).
- Fire resistance: SIP panels can be tested and certified to applicable codes (e.g., REI 30, REI 60), depending on safety requirements.
- Wind and snow loads: Calculate the structure's ability to withstand the climatic conditions specific to the area.
- Seismic requirements: Compliance with current regulations (e.g., P100 in Romania) for seismic-risk areas.
4. Glossary of Technical Terms
To clarify terminology frequently used in SIP panel design, a concise glossary is useful:
- EPS (Expanded Polystyrene): Thermal insulation material obtained by expanding polystyrene, with good insulating properties and a relatively low cost.
- XPS (Extruded Polystyrene): Extruded polystyrene with a denser structure, superior mechanical strength, and a lower thermal conductivity coefficient.
- PUR (Polyurethane): Rigid foam used as insulation, with very good thermal insulation values.
- MgO (magnesium oxide board): Rigid material, resistant to fire and moisture, used as an exterior layer on some SIP panels.
- NZEB (Nearly Zero Energy Building): A building with very low energy consumption, most of the energy being supplied from renewable sources.
- Thermal bridge: An area of the building envelope through which heat escapes more easily, usually at joints, corners, or areas with metal/timber structure.
- STC (Sound Transmission Class): An index that quantifies the level of acoustic insulation of a wall or panel system.
- Vapor barrier: An impermeable layer that prevents water vapor from migrating from the interior to the exterior of the building.
Value delivered to architects and designers
Through this guide, architects and designers can gain an in-depth understanding of:
- How SIP panels work and what direct benefits they bring to their projects.
- The concrete steps for quickly and efficiently integrating SIP into any type of construction (residential, commercial, industrial).
- The resources and support available, so that the research and implementation phase is as easy as possible.
- The opportunities for innovation and growth in the field of green, energy-efficient construction.
With the information in this guide, designers have a solid foundation on which to base their technical decisions, optimize their concepts, and offer clients modern, fast, and eco-friendly solutions. And working with BucovinaSIP provides access to valuable expertise, from the design phase through to final implementation.